On Amazon, shoppers cannot pick your product up, turn it over or feel the material. Your listing images do that job for them. They decide whether someone clicks your result in a crowded search page, and once the shopper lands on the detail page, they do much of the persuading before anyone reads a bullet point. A listing with average copy and excellent images will often outsell a listing with excellent copy and average images.
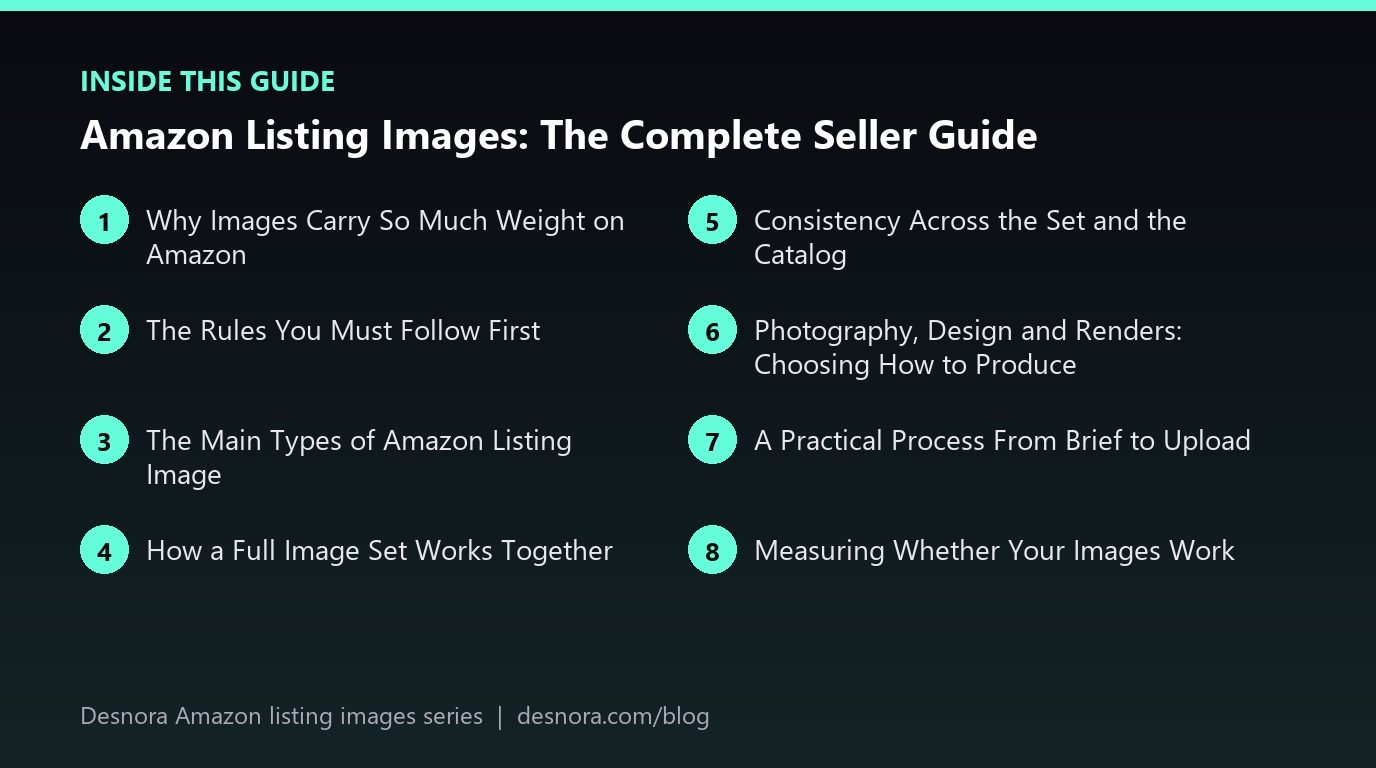
This guide is the starting point for our Amazon listing images series. It explains why images matter so much, the different types of image you can use, how a complete set should work together and a practical process for getting from an idea to live files in Seller Central. Each section links to a more detailed article when you are ready to go deeper on a single topic.

Why Images Carry So Much Weight on Amazon
Amazon is a visual marketplace that happens to have text on it. Most shoppers browse on phones, where the image gallery fills the screen and the bullet points sit further down the page. Many people swipe through the images, check the price and reviews, and decide without reading much else. That makes images the closest thing you have to a sales conversation.
Images influence three things that matter to your sales:
- Click-through rate. Your main image is the biggest visual element in a search result. It competes directly with the products above and below yours.
- Conversion rate. Once a shopper is on your page, the gallery answers their questions about size, quality, features and use. Unanswered questions lead to hesitation.
- Returns and reviews. Images set expectations. When the product that arrives matches what the images showed, buyers are satisfied. When it does not, you see "not as described" returns and disappointed reviews.
Because click-through and conversion feed into how Amazon ranks listings and how efficiently your advertising spends, better images can improve organic visibility and ad performance at the same time. Our article on how listing images drive click-through and conversion shows how to measure that effect.
The Rules You Must Follow First
Before thinking creatively, every seller needs to know the technical and policy baseline. The main image must have a pure white background, show only the product being sold, fill most of the frame and carry no text, logos, badges or borders. Files must be in an accepted format, with JPEG preferred, and large enough to enable zoom, which means at least 1000 pixels on the longest side. Secondary images have more freedom but still cannot mislead, show prohibited content or make claims you cannot support.
Breaking these rules can get an image rejected or a listing suppressed, so treat them as the foundation of every shoot and design project. The full breakdown of formats, pixel sizes, colour modes and the difference between main and secondary image rules is in our guide to Amazon product image requirements and technical specs. Requirements can vary by category and marketplace and are updated from time to time, so confirm the current style guide in Seller Central before a large project.
The Main Types of Amazon Listing Image
Most strong listings combine several distinct image types. Each one answers a different question a shopper is asking.
Main image
The hero shot on white. It must be compliant, instantly recognisable at thumbnail size and show the product at its most appealing angle. It is the only image most shoppers see before they decide whether to click.
Alternate angles and detail shots
Back, side, underside and close-ups of materials, stitching, ports, closures or texture. These build confidence in quality and help shoppers who want to inspect before buying.
Infographics
Designed images that pair the product with short text, icons and callouts to explain features and benefits. They are the workhorses of the secondary slots.
Lifestyle images
The product in a real setting, often with a person using it. They help shoppers imagine owning the product and signal who it is for.
Scale and dimension images
Measurements, in-hand shots or comparisons with familiar objects. They prevent the classic "smaller than expected" complaint.
What's in the box
A clear layout of everything included, from the main unit to cables, manuals and spare parts.
Comparison charts
Side-by-side tables showing how your product differs from generic alternatives or other models in your own range.
Video
Product videos sit alongside the image gallery and can demonstrate movement, assembly or results in ways stills cannot.
How a Full Image Set Works Together
A common mistake is to treat each image as a separate task. A shopper experiences the gallery as a sequence, usually in a few seconds of swiping. The set should read like a short sales story: grab attention, explain the main benefit, prove it, remove doubts and help the shopper picture the product in their life.
Think of the set in three layers:
- Attention. The main image earns the click, and the second image confirms the shopper is in the right place by stating the core benefit clearly.
- Persuasion. The middle images explain features, show the product in use and answer the questions that most often come up in reviews and customer messages.
- Reassurance. The later images handle the practical details: size, contents, compatibility, care and guarantees.
Amazon commonly allows up to nine images, with around seven shown in the gallery on many pages, plus video. Exact display varies by device and category. Our guide to the ideal Amazon image stack gives a slot-by-slot plan with examples by product type.
Consistency Across the Set and the Catalog
Images that share a colour palette, typeface, icon style and photographic look feel like they come from a serious brand. Mismatched images, where one infographic is blue and bold and the next is pastel and thin, feel like a seller who pulled assets together from different suppliers. Consistency matters even more when you sell several products: shoppers who recognise your style in search results learn to trust it.
Set simple rules for fonts, colours, icon style, margins and how text is positioned, then apply them to every image and every product. Those same rules should carry into your A+ content and Brand Store so the whole brand experience feels joined up. If you are building those pages too, see our Premium A+ content and Brand Store design services.
Photography, Design and Renders: Choosing How to Produce
There are three main ways to create listing images, and most brands mix them:
- Studio photography for white background shots, details and lifestyle scenes. It gives the most realistic result but needs physical samples.
- Graphic design to turn photographs into infographics, comparison charts and dimension images.
- 3D renders for products that are not yet manufactured, products with complex internal parts or catalogues with many colour variants.
Small sellers can produce acceptable photography at home with care, while established brands usually benefit from a professional studio and designer. Whatever route you choose, the final images must represent the real product accurately. A render or heavily retouched photo that makes a product look better than it is will cost you in returns and reviews.
A Practical Process From Brief to Upload
Good image sets are planned, not improvised. This process works for a single product or a whole range:
- Research. Read your reviews, competitor reviews and customer questions. List the doubts and desires shoppers mention most. Look at competitor galleries and note what everyone shows and what nobody shows.
- Plan the story. Decide what each of your image slots will do, in order, and which single message each image carries.
- Write the brief. Turn the plan into a shot list and design brief with references, copy for overlays, required angles and file specifications. Our article on writing an image brief includes a template.
- Shoot and design. Photograph the product, retouch carefully and build the designed images.
- Review on a phone. Check every image at real size on a mobile screen. If text is unreadable or the product is hard to recognise as a thumbnail, revise.
- Check compliance. Confirm the main image follows the rules and that every claim on the secondary images can be supported.
- Upload and verify. Upload in the right order, then check the live listing on desktop and mobile once processing finishes.
- Measure and iterate. Watch click-through and conversion, and test alternative main images where you can.
Measuring Whether Your Images Work
Images are an investment, so judge them by results. The metrics that matter most are click-through rate from search, the unit session percentage on your detail page and, over time, return reasons and review comments that mention appearance or size. Brand-registered sellers can use Manage Your Experiments to test main images and other content against each other with real traffic, which removes much of the guesswork. Sellers without Brand Registry can still compare periods before and after a change, although results are less reliable because other factors shift at the same time.
Plan to revisit images regularly. Competitors update their galleries, packaging changes and reviews reveal new questions. A gallery that was strong at launch can look dated two years later.
A Worked Example: Building a First Image Set for a Kitchen Product
A small brand is launching a stainless steel garlic press. Its supplier images show the press on a grey background with a Chinese-language label, and a competitor audit shows most rivals use the same three generic angles.
The brand reads several hundred competitor reviews and finds three recurring complaints: presses that are hard to clean, handles that hurt to squeeze and hinges that snap. It plans a gallery around those concerns. The main image shows the press slightly open at a three-quarter angle on pure white, filling most of the frame, so the sturdy hinge is visible even as a thumbnail. Image two states the core benefit, "Crushes unpeeled cloves with one easy squeeze", with a close-up of the press in action. Image three shows the removable cleaning insert and a dishwasher icon. Image four highlights the solid hinge with a short callout. Image five is a lifestyle shot of a home cook using it beside a chopping board. Image six shows dimensions and the press in a hand for scale. Image seven shows everything included.
The team checks every image on a phone, enlarges two lines of text that were too small and uploads the set. Over the following weeks, fewer customer questions ask about cleaning, and new reviews mention ease of use, confirming the images are answering the right questions.
Common Pitfalls to Avoid
- Using supplier images that other sellers also use, which makes your listing look identical to cheaper rivals.
- Filling every secondary image with dense text that cannot be read on a phone.
- Repeating the same message across several images while leaving key questions unanswered.
- Showing accessories or props that are not included without making that clear.
- Uploading images below zoom resolution, so shoppers cannot inspect details.
- Never revisiting images after launch.
Our article on Amazon product image mistakes that hurt sales covers several of these in more detail.
Your Listing Images Checklist
- Main image compliant: pure white background, product only, about 85% fill, no text or badges.
- Files at least 1000 pixels on the longest side, ideally larger, in JPEG or another accepted format.
- Every available slot used, with one clear message per image.
- Gallery ordered as a story from attention to reassurance.
- Top shopper questions from reviews answered visually.
- Scale, contents and key specifications shown clearly.
- Consistent fonts, colours and style across images and products.
- Every image checked at real size on a phone.
- All claims accurate and supportable.
- Performance tracked and images reviewed on a regular schedule.
Desnora designs complete Amazon image sets, from research and briefs to photography, infographics and lifestyle scenes. Explore our Amazon listing image design service or contact us to talk about your products.
Frequently Asked Questions
How many images should an Amazon listing have?
Use every slot available in your category, which is commonly up to nine images plus video. Around seven are usually visible in the gallery, so put your most important images first.
What is the most important Amazon listing image?
The main image, because it appears in search results and decides whether shoppers click. It must also follow the strictest rules, including a pure white background and no text.
Can I use my supplier's product images?
Only if you have permission and they accurately show your exact product. Supplier images are often shared by many sellers, so original images usually help you stand out.
Do secondary images need a white background?
No. Secondary images can use coloured backgrounds, settings, text and graphics, provided they are accurate and follow Amazon's content policies.
What types of image should I include?
A strong set usually includes a main image, alternate angles or details, infographics, lifestyle images, a scale or dimension image and a what's in the box image, plus video where possible.
How do I decide the order of my images?
Treat the gallery as a story: earn attention, explain the main benefit, prove it and then reassure on practical details such as size and contents.
Should I hire a professional or create images myself?
Careful home photography can work for simple products and tight budgets. Brands competing in crowded categories usually benefit from professional photography and design.
How large should my image files be?
At least 1000 pixels on the longest side to enable zoom, and ideally around 1600 to 2000 pixels or more for sharp detail.
How do I know if my images are working?
Track click-through rate, unit session percentage, return reasons and review comments. Brand-registered sellers can test variations with Manage Your Experiments.
How often should I update my listing images?
Review them at least a few times a year and whenever packaging changes, competitors raise the standard or reviews reveal new questions.
Do images affect my Amazon ranking?
Indirectly. Images influence click-through and conversion, which are signals that affect how listings perform in search and how efficiently ads spend.
Can I use the same style for A+ content and my Brand Store?
Yes, and you should. Matching fonts, colours and photography across listing images, A+ content and your Brand Store builds recognition and trust.